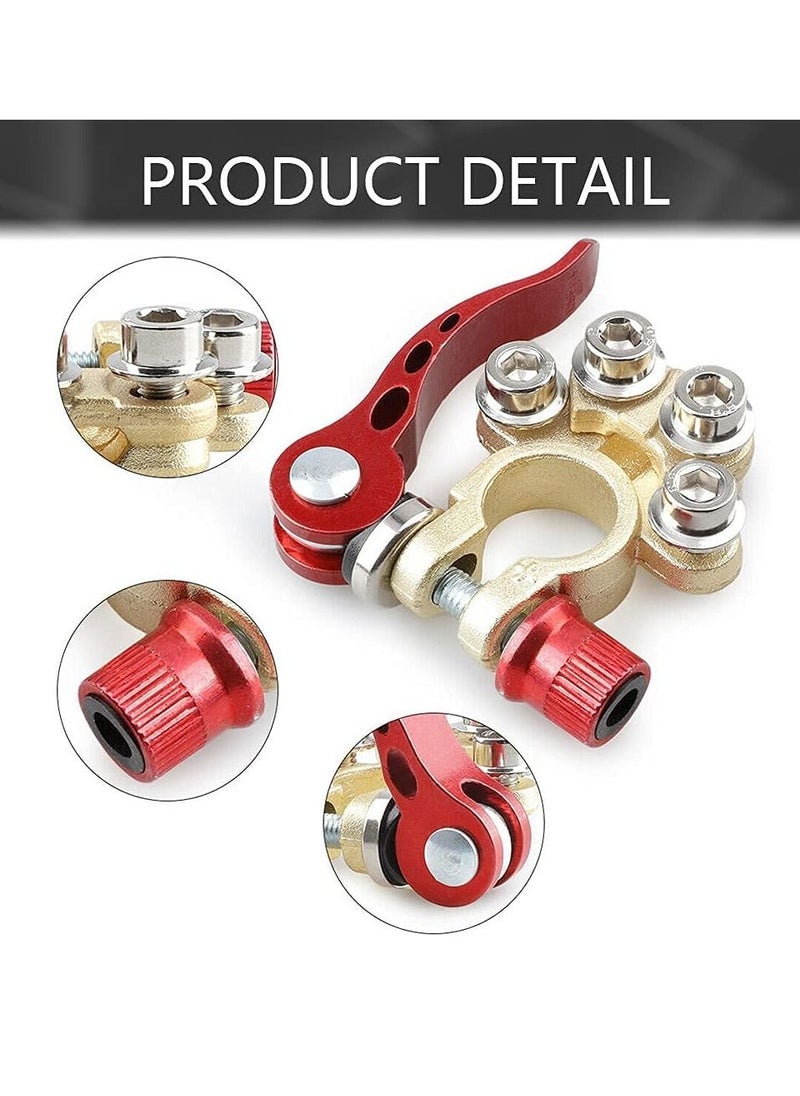
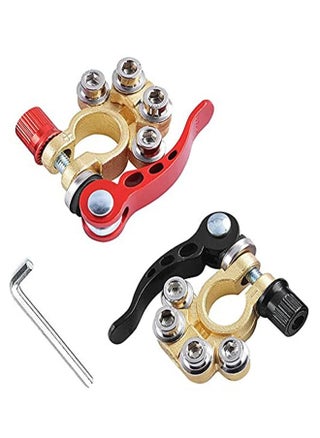
Usage Steps
1. **Prepare Tools and Materials**:
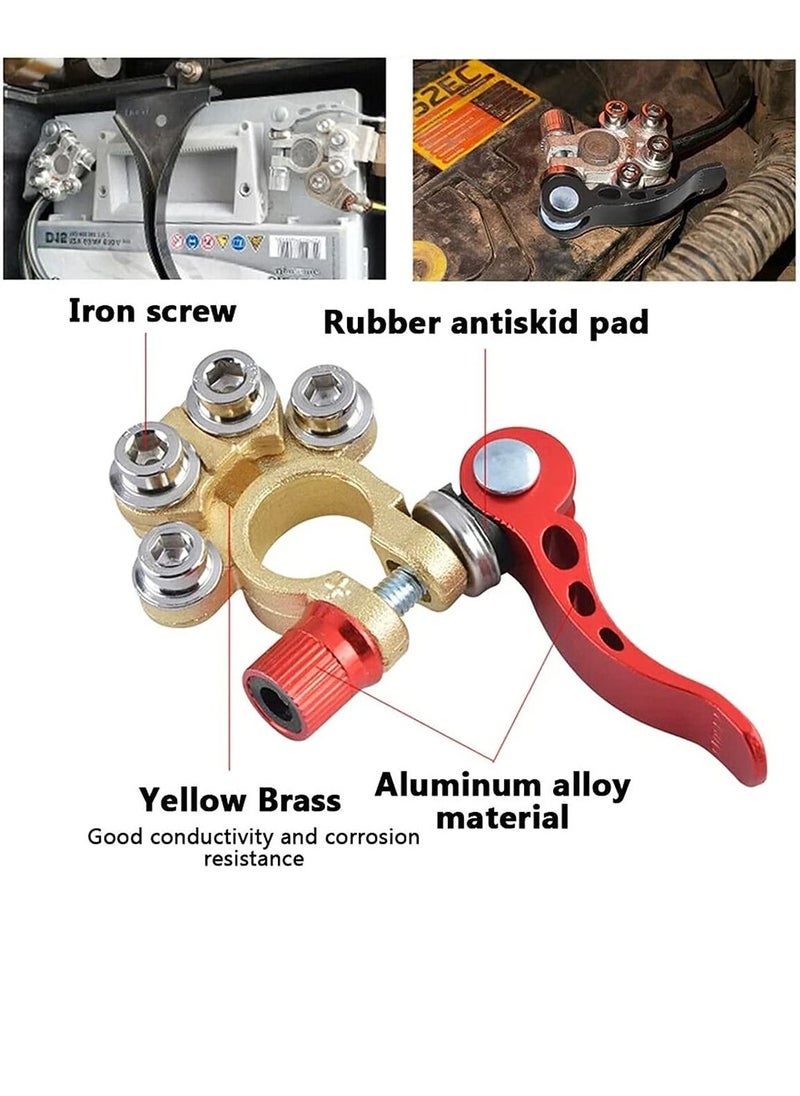
- Ensure you have the appropriate tools, such as a hex key, wire stripper, and screwdriver.
- Check that the connector and cables are in good condition.
2. **Confirm Cable Size**:
- Ensure the cable diameter is between 5.2 - 7.4mm (AWG 1 - 4) or a cross-section of 16 - 35mm².
- Make sure the minimum wire size is 16mm (5/8”), with a maximum wire clamp of 9.5mm (0.37in) and a mini wire clamp of 6.5mm (0.25in).
3. **Strip the Wire**:
- Use the wire stripper to remove the insulation from the cable, exposing an appropriate length of copper wire (usually about 1-2 cm).
4. **Connect the Cable**:
- Insert the stripped copper wire into the terminal of the SAE connector.
- Use the hex key to tighten the screw, ensuring the connection is secure and tight.
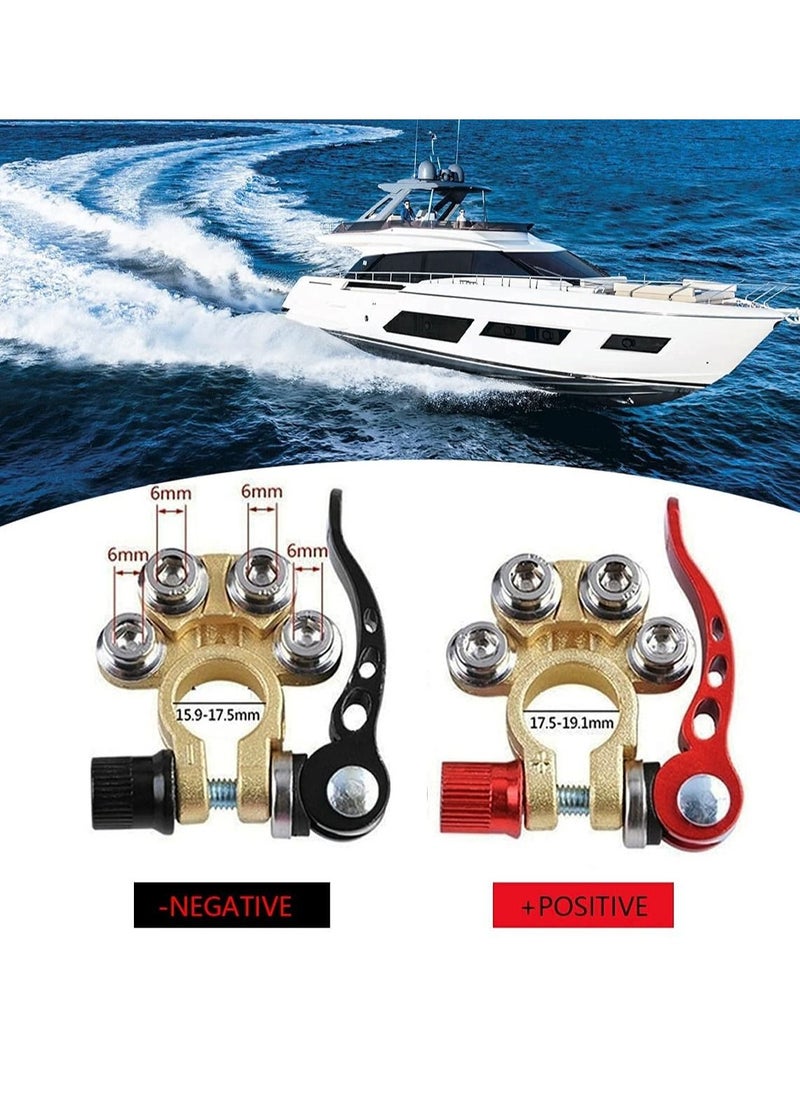
5. **Identify Polarity**:
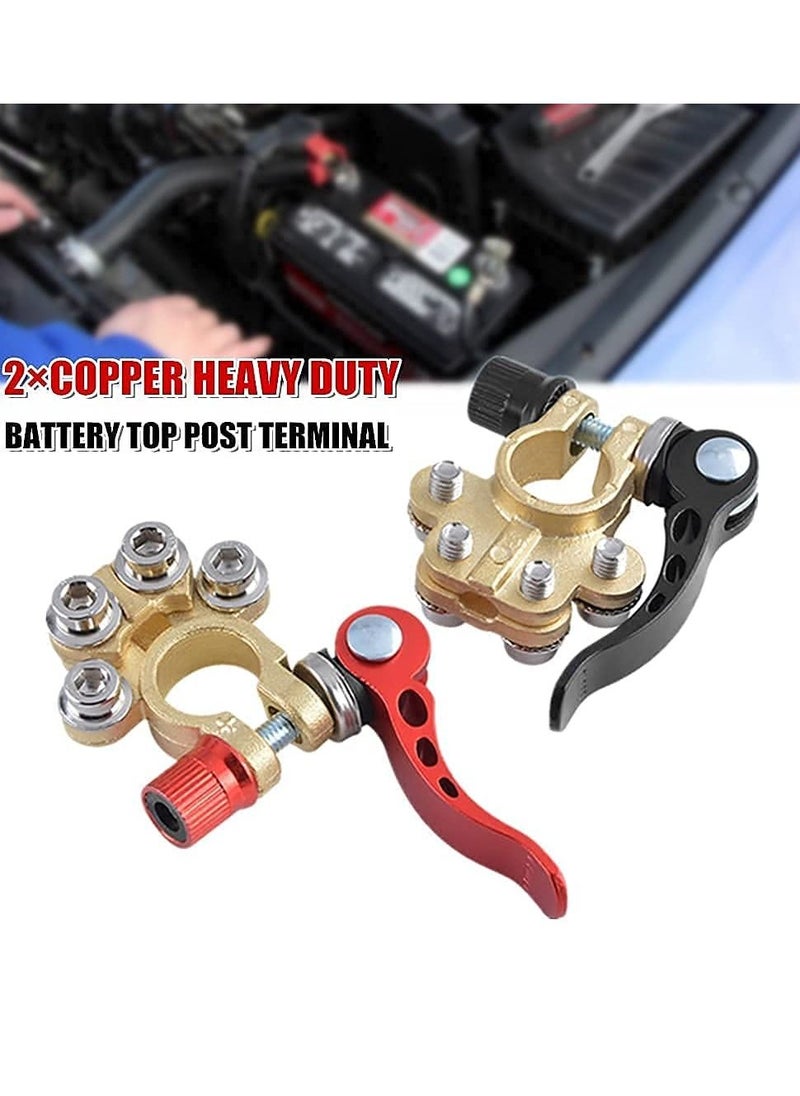
- Ensure that the positive (red) and negative (black) terminals are connected correctly to avoid short circuits or damage to the equipment.
6. **Check the Connection**:
- After completing the connection, gently pull on the cable to confirm that it is secure.
- Check the terminal for any visible oxidation or corrosion.
7. **Power Test**:
- Once everything is connected, perform a power test on the device to ensure it is functioning correctly.
Precautions
- **Confirm Polarity**: Always verify the positive and negative polarity before use to avoid short circuits.
- **Safety Precautions**: Ensure the power is turned off when installing or removing to avoid the risk of electric shock.
- **Regular Maintenance**: Periodically check the connectors and cables to ensure there is no wear or corrosion.
 Free & Easy Returns
 Best Deals


![/fashion-men/jack_jones/?sort[by]=popularity&sort[dir]=desc&limit=50](https://a.nooncdn.com/cms/pages/20240305/4ef48af441e2b44cea1673cd2e4aff67/en_dk-men-brands-04.png)


![/fashion-men/seventy_five/?sort[by]=popularity&sort[dir]=desc&limit=50](https://a.nooncdn.com/cms/pages/20240305/4ef48af441e2b44cea1673cd2e4aff67/en_dk-womens-new-brands-01.png)
![/fashion-men/skechers/?sort[by]=popularity&sort[dir]=desc&limit=50](https://a.nooncdn.com/cms/pages/20240305/4ef48af441e2b44cea1673cd2e4aff67/en_dk-womens-new-brands-02.png)


![/fashion-women/mango/?sort[by]=popularity&sort[dir]=desc&limit=50](https://a.nooncdn.com/cms/pages/20240305/4ef48af441e2b44cea1673cd2e4aff67/en_dk-women-brands-05.png)
![/fashion-women/guess/?sort[by]=popularity&sort[dir]=desc&limit=50](https://a.nooncdn.com/cms/pages/20240305/4ef48af441e2b44cea1673cd2e4aff67/en_dk-women-brands-09.png)


![/fashion-women/ella/?sort[by]=popularity&sort[dir]=desc&limit=50](https://a.nooncdn.com/cms/pages/20241812/en_dk-nav-brands-01.png)
![/fashion-women/skechers/?sort[by]=popularity&sort[dir]=desc&limit=50](https://a.nooncdn.com/cms/pages/20241812/en_dk-nav-brands-02.png)


![/fashion/view-all-kids-clothing/nike/?sort[by]=popularity&sort[dir]=desc&limit=50](https://a.nooncdn.com/cms/pages/20240911/nav-web/en_mb_uae_brand-01.png)
![/fashion/view-all-kids-clothing/disney/disney_minnie_mouse/disney_frozen/disney_princess/disney_mickey_mouse/disney_baby/?sort[by]=popularity&sort[dir]=desc&limit=50](https://a.nooncdn.com/cms/pages/20240911/nav-web/en_mb_uae_brand-03.png)


![/fashion/view-all-kids-clothing/new_balance/?sort[by]=popularity&sort[dir]=desc&limit=50](https://a.nooncdn.com/cms/pages/20240911/nav-web/en_mb_uae_brand-11.png)


![/music-movies-and-tv-shows/musical-instruments-24670/pianos-keyboards-synthesizers/chloris/?sort[by]=popularity&sort[dir]=desc&limit=50&page=1&isCarouselView=false](https://f.nooncdn.com/cms/pages/20250407/books-nav/en_uae_dk-nav-brands-04.png)
![/music-movies-and-tv-shows/musical-instruments-24670/pianos-keyboards-synthesizers/roland/?sort[by]=popularity&sort[dir]=desc&limit=50&page=1&isCarouselView=false](https://f.nooncdn.com/cms/pages/20250407/books-nav/en_uae_dk-nav-brands-05.png)
![/music-movies-and-tv-shows/musical-instruments-24670/pianos-keyboards-synthesizers/donner/?sort[by]=popularity&sort[dir]=desc&limit=50&page=1&isCarouselView=false](https://f.nooncdn.com/cms/pages/20250407/books-nav/en_uae_dk-nav-brands-06.png)
![/music-movies-and-tv-shows/musical-instruments-24670/pianos-keyboards-synthesizers/korg/?sort[by]=popularity&sort[dir]=desc&limit=50&page=1&isCarouselView=false](https://f.nooncdn.com/cms/pages/20250407/books-nav/en_uae_dk-nav-brands-07.png)