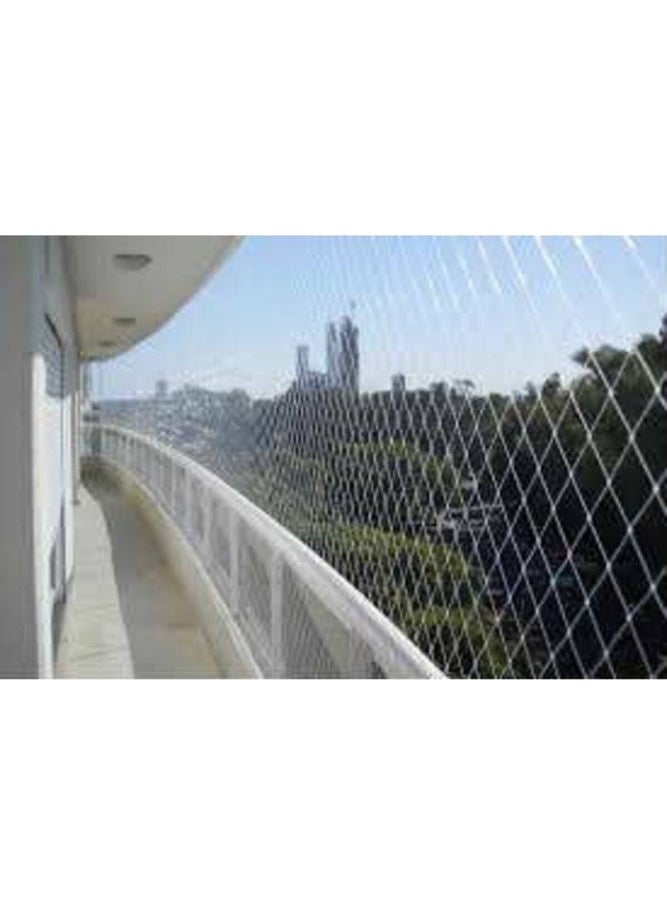
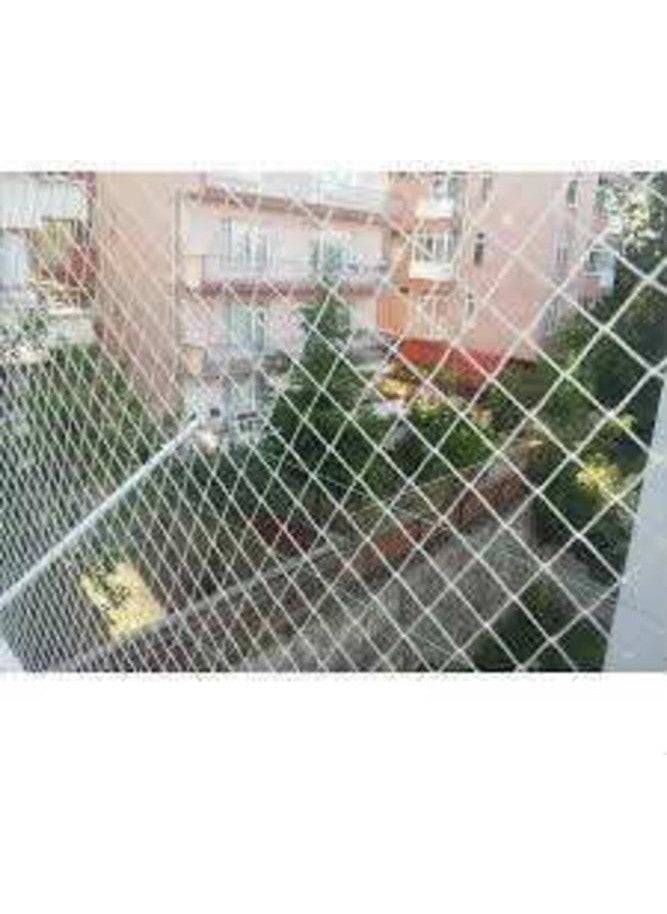
NOTE: MISTAKES MADE WHEN INSTALLING THE NET: IF YOU HANG THE TOP PARTS TENSE BEFORE PASSING THE STEEL ROPE FROM THE EDGE, THE MIDDLE OF THE NET WILL LIFT IN THE AIR AND THE NET WILL STAY TROUBLE. YOU MUST PASS A ROPE OR STEEL ROPE ON 4 SIDES WHILE INSTALLING. You can install a net on your balcony by following the steps below; INSTALLATION MATERIAL IS SOLD SEPARATELY IN OUR STORE. To install the balcony net, holes must first be drilled in the wall. These holes must be opened carefully. The carefully drilled balcony holes must be at appropriate intervals to ensure comfortable installation of the net. Then, the previously provided steel dowels are placed into the holes on the wall. After the dowels are placed in the wall holes, the ropes of the balcony net are carefully inserted. Then the ropes passing to the net are tightened. AT THE LOWER MIDDLE PART OF THE NET, THE ROPES ARE ATTACHED TO THE TENSIONER AND TIGHTENED AND TENSIONED BY TURNING. After the tensioning process, the balcony net is made ready for use. BIRD NET BALCONY BIRD NET BALCONY NET BALCONY BIRD NET 0.6 MILLION ROPE THICKNESS IT IS UV ADDITIVE IT WILL NOT ROT OR RINSE FOR MANY YEARS IT IS 2 CM POROS SEPARATED IT CANNOT PASS THROUGH IT, INCLUDING THE SPARROW
Specifications
Colour Name
White
Cart Total 124.00
We're Always Here To Help
Reach out to us through any of these support channels
'`noon`', the 'noon device', 'noon east', 'east' and the 'east device' are trade marks or registered trade marks of Noon AD Holdings LTD. in the UAE and other countries
 Free & Easy Returns
 Best Deals


![/fashion-men/jack_jones/?sort[by]=popularity&sort[dir]=desc&limit=50](https://a.nooncdn.com/cms/pages/20240305/4ef48af441e2b44cea1673cd2e4aff67/en_dk-men-brands-04.png)


![/fashion-men/seventy_five/?sort[by]=popularity&sort[dir]=desc&limit=50](https://a.nooncdn.com/cms/pages/20240305/4ef48af441e2b44cea1673cd2e4aff67/en_dk-womens-new-brands-01.png)
![/fashion-men/skechers/?sort[by]=popularity&sort[dir]=desc&limit=50](https://a.nooncdn.com/cms/pages/20240305/4ef48af441e2b44cea1673cd2e4aff67/en_dk-womens-new-brands-02.png)


![/fashion-women/mango/?sort[by]=popularity&sort[dir]=desc&limit=50](https://a.nooncdn.com/cms/pages/20240305/4ef48af441e2b44cea1673cd2e4aff67/en_dk-women-brands-05.png)
![/fashion-women/guess/?sort[by]=popularity&sort[dir]=desc&limit=50](https://a.nooncdn.com/cms/pages/20240305/4ef48af441e2b44cea1673cd2e4aff67/en_dk-women-brands-09.png)


![/fashion-women/ella/?sort[by]=popularity&sort[dir]=desc&limit=50](https://a.nooncdn.com/cms/pages/20241812/en_dk-nav-brands-01.png)
![/fashion-women/skechers/?sort[by]=popularity&sort[dir]=desc&limit=50](https://a.nooncdn.com/cms/pages/20241812/en_dk-nav-brands-02.png)


![/fashion/view-all-kids-clothing/nike/?sort[by]=popularity&sort[dir]=desc&limit=50](https://a.nooncdn.com/cms/pages/20240911/nav-web/en_mb_uae_brand-01.png)
![/fashion/view-all-kids-clothing/disney/disney_minnie_mouse/disney_frozen/disney_princess/disney_mickey_mouse/disney_baby/?sort[by]=popularity&sort[dir]=desc&limit=50](https://a.nooncdn.com/cms/pages/20240911/nav-web/en_mb_uae_brand-03.png)


![/fashion/view-all-kids-clothing/new_balance/?sort[by]=popularity&sort[dir]=desc&limit=50](https://a.nooncdn.com/cms/pages/20240911/nav-web/en_mb_uae_brand-11.png)


![/music-movies-and-tv-shows/musical-instruments-24670/pianos-keyboards-synthesizers/chloris/?sort[by]=popularity&sort[dir]=desc&limit=50&page=1&isCarouselView=false](https://f.nooncdn.com/cms/pages/20250407/books-nav/en_uae_dk-nav-brands-04.png)
![/music-movies-and-tv-shows/musical-instruments-24670/pianos-keyboards-synthesizers/roland/?sort[by]=popularity&sort[dir]=desc&limit=50&page=1&isCarouselView=false](https://f.nooncdn.com/cms/pages/20250407/books-nav/en_uae_dk-nav-brands-05.png)
![/music-movies-and-tv-shows/musical-instruments-24670/pianos-keyboards-synthesizers/donner/?sort[by]=popularity&sort[dir]=desc&limit=50&page=1&isCarouselView=false](https://f.nooncdn.com/cms/pages/20250407/books-nav/en_uae_dk-nav-brands-06.png)
![/music-movies-and-tv-shows/musical-instruments-24670/pianos-keyboards-synthesizers/korg/?sort[by]=popularity&sort[dir]=desc&limit=50&page=1&isCarouselView=false](https://f.nooncdn.com/cms/pages/20250407/books-nav/en_uae_dk-nav-brands-07.png)